Updates!
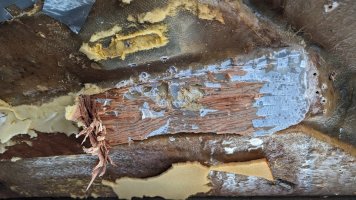
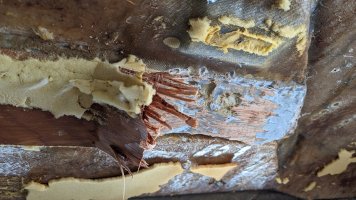
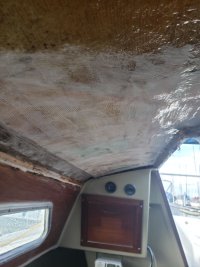
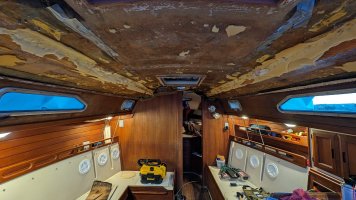
tl;dr - it's been a LOT of work. I've been through a range of emotions. Filled voids, tabbed bulkheads, faired, sanded, laminated, molded, waxed, released, etc. I'm approaching final fairing and then... paint.
This project has been a LOT. That word in all caps is probably an severe understatement. I became pretty depressed at one point and took a step back to work on a little things around the house and the SSS website/infra (
old site &
preview site if you're interested). This project has interrupted all other work on the boat. Watching my late summer sailing plans melt away wasn't a fun experience. But taking some time to appreciate the natural order of things, how nice the cabin will feel when this is done and getting the boat to the place where I want it to be was very worthwhile. Live in the now, as they say.
I've been known to say "sailing is the ultimate teacher of acceptance". My new thought is that the sailboat itself is the instructor.
Anywho, enough about feelings and life. Let's look at the cabin...
Terms & Definitions
Before digging in, I figure it will be good to define a few things. When I started this project I barely knew the starting concepts of working with composites. When folks around here would mention "just add some microballoons to the resin" I would scratch my head and wonder. So, I'm just including here in case there are others in the same space I was in.
Resin - anytime I mention 'resin' below, I used West System 105 Epoxy Resin with 206 Slow Hardener. It's been a warmish summer here in Richmond and I found quickly that the 205 Fast Hardener would gel way too quickly, making me rush and make mistakes.
Corecell - Corecell is a closed cell foam which is cut in sheets similar to plywood. It's rigid, but flexible to a point, and has a compressive strength of 200lb/sq-in. It's moldable with heat, and sands easily. Because of the closed cell formation it's impervious to water penetration. Used in newer boats to core the hull and other pieces which are eventually glassed in. Lighter than balsa and other woods. And not susceptible to "core damage".
403/404/406/407/410 - These are all fillers for resin from West System. See
https://www.westsystem.com/filler-selection-guide-2/ for more information. Each filler has a detailed TDS to understand it's properties. They can be mixed to form intermediate solutions for adhesion, void filling, structural bonding, etc
Milled fibers - Literally, fiberglass milled into 1/32" pieces. When added as an epoxy resin filler will cure to high compressive strength. Reference:
https://www.totalboat.com/blogs/totalboat/epoxy-fillers-how-when-to-use-them
Wax - Mold release wax. Epoxy won't cure to it. But, it will also contaminate your work area. I sectioned off a the chart table in the cabin as my "contamination area" where only waxed pieces and tools would go. In order to be placed anywhere else in the cabin, they would first need to be scrubbed with a clean cloth and acetone.
Peelply/Release Cloth - a cloth specially designed to not bond to cured resin. Assists with layup by creating a uniform surface on the outer most layer of fiberglass cloth.
Filling Voids
Began filling voids and the area around the handrail pedestals by gluing pieces of corecell foam, cut to shape. I used resin with 406 in a non-sag peanut butter consistency. Because corecell is so light, the 406 would hold the pieces in place with no need for bracing or strapping. I then filled the cracks with a mixture of 406 & 407 (microballoons) and sanded everything to shape. Some voids, like under the running boards of wood I used 410 (microlight) because it filled more space with less filler. None of this is structural -- it's all aesthetic.
Now that I had a new intermediary nonstructural "core", I needed to complete the sandwich and laminate. I used two layers of 10oz cover cloth. Laminating upside down is a bit tricky, but the
West Systems Fiberglass Manual from 2015 (see Appendix C) has some great techniques to borrow from. I modified slightly by creating a thickened film of resin and 406 on the surface. This would act as a sticky "glue" to which the cloth would stick to. Then I would wet out the sections of fabric one at a time on a makeshift large cardboard box covered in 3mil plastic sheeting. The wet-out resin has a few pinches of 406 just to keep the resin from dripping off and making a mess.
Each piece of wet fabric would then be rolled around a cardboard tube and unrolled from the highest point down to the lowest point. While unrolling with one hand I would squeegee the cloth against the thin film on the deckhead. In this way, I was able to work solo and never made a mess of my plastic covered floor. I still have all my arm hair and skin as well
Peel ply release cloth was added and a ridged roller was used to ensure the cloth was compressed as much as possible into the resin.
I was careful to retain the mounting holes for the grabrails, which are made from threaded holes in aluminum plates glassed into the deck head in those pedestals. To do so, I used release wax on screws which would be removed for sanding after the fiberglass cured.
Bulkheads
The bulkheads had some interesting spaces in between the minimal amount of tabbing from initial building. I wanted to create a smooth joint. My rigger suggested I re-tab the bulkheads to add some extra rigidity to the boat. I chose the middle ground and supplemented the existing tabs.
First I glued corecell into the open spaces with 406. Then I created fillets with large popsicle sticks and a combination of 406/407. I probably could have used Wood Flour as a filler, but this is probably fine.
After sanding the fillets with pieces of wooden dowels wrapped in Stick-It sandpaper, I glassed over the rounded corner with 27oz X-mat (1708) cloth. 1708 has two layers of 45degree bias fabric with a .75oz smooth mat on one side. It's designed to layup with the smooth mat towards the surface for mechanical bonding strength, which leaves a rough side facing up. I covered with an additional piece of 10oz cover cloth for a smoother surface facing outward.
Mast Collar
The area around the mast collar on the deck head was pretty uneven. There is another aluminum plate sandwiched in the deck fiberglass with threads for the bolts for the mast collar deckplate, which holds all the turning blocks for halyards, lines, etc arriving to the deck organizers from the mast. I decided to drill out the threads and through-bolt the deckplate into the cabin. If water penetrates the sealant on those holes, I don't want it to get trapped in the core of the deck -- the aluminum plate would begin corroding and puffing up the deck, leading to delamination and other horrible things. I'm also not at the point yet where I want to carve the plate out of the deck and rebuild. I have my limits with this project
So, I mixed up a pot of resin with milled fibers and 404 (high density). This will help support the compressive strength needed for those through-bolts. I didn't bother to laminate and I hope I don't kick myself later... Just thinking with only 1/4" of filling needed at the lowest point it should be fine as long as it's faired with the rest of the deck head later.
Continuing to next post...