• Untitled Document

    The 2024-2025 Fund Raising Season has Opened!

    EricsonYachts.org has opened the season for raising funds to support the expenses of the site. If you would like to participate, please see the link below for additional information.

    Thanks so much for your continued support of EricsonYachts.org!

    2024-2025 Fund Raising Info

Fairing, sanding, and painting the deckhead

vanilladuck

E32-3 / San Francisco
Blogs Author
PXL_20240409_024447651.MP.jpg

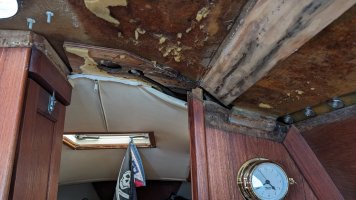
A brief pause while you retrieve your jaw from the floor or keyboard...

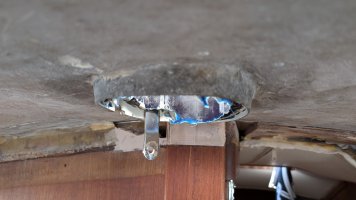
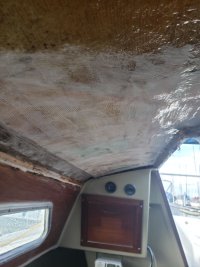
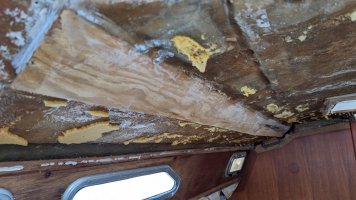
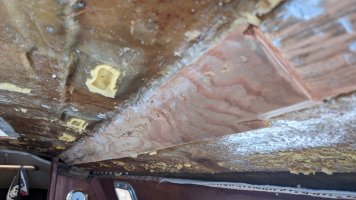
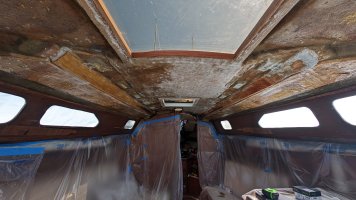
In the midst of a major refit of running gear, I started removing the headliner on Rumour. Abhorred by a million and one rusted staples, a series of complex folds, and a lot of mold, I started thinking there's gotta be a better way to dress up the deckhead. So, off it came. What a mess.

I'm planning on fairing, sanding, and painting the deckhead. It should be easier to spot leaks and I can finish all the through-bolted gear with nice shiny stainless cap head nuts.

Anyone have any experience doing this on an Ericson? Photos and tips to share?
 

RedDog

Member II
View attachment 49631

A brief pause while you retrieve your jaw from the floor or keyboard...

In the midst of a major refit of running gear, I started removing the headliner on Rumour. Abhorred by a million and one rusted staples, a series of complex folds, and a lot of mold, I started thinking there's gotta be a better way to dress up the deckhead. So, off it came. What a mess.

I'm planning on fairing, sanding, and painting the deckhead. It should be easier to spot leaks and I can finish all the through-bolted gear with nice shiny stainless cap head nuts.

Anyone have any experience doing this on an Ericson? Photos and tips to share?
Wow!! You are a brave soul! That’s a lot of love you are pouring into Rumour! It’s going to be beautiful. Please post again showing the finished deck head.
 

Slick470

Sustaining Member
We stripped our v-berth a few years back due to a long term leak that had been hidden by the headliner. I keep bouncing back and forth with trying to put it back as it was, vs something similar but installed differently, or just fill, fair, and paint. I'm happy to follow along to see how yours turns out.

After stripping ours, I did sand everything down to remove all the stuck on glue and all the rough ends of the fiberglass. It is pretty obvious that Ericson never intended for the underside of the deck to ever see the light of day again and didn't put much effort in making it look clean so that bit of effort on my part made a big difference.
 

Loren Beach

O34 - Portland, OR
Senior Moderator
Blogs Author
We managed to mostly remove our headliner when re-bedding all of the deck fittings, Many many staples were involved. There is a thread here, back a little ways, of the new fabricated vinyl head liner on an O-34, sewn from a pattern, and reinstalled the factory method. Looked great to me and the owner was able to have/create zipper access to all backing plates and nuts.
This has the advantage of maintaining the maximum headroom inside, since the stock scheme has only a sheet of 1/4" foam above the headliner and the bolts were nipped off flush with the nuts.

We were able to flush-finish all of the new bolts when the deck gear went back on.

If I had my "druthers" I would have a panel-type of overhead, with a half inch of insulation above it, secured by varnished battens. But that would lower our usable headroom by about 1 to 1.5 inches, and I need every fraction of the present 6'2" of headroom in our interior.

(Count your blessings that EY did not copy Beneteau and Glue 100% area of their vinyl headliner up into place..... and then have it all fall down starting about 10 to 15 years later when their adhesive massively failed on many of their boats.
That invisible "fin" that EY sewed into place and then stapled to a batten was clever and effective. It was fussy to restore when we were finishing up, but if I can do it, any average duffer can do it.) :rolleyes:
 

G Kiba

Sustaining Member
OMG Brian. It's a good thing you have time to work on the boat. Wait. Or maybe you have too much time to work on the boat? It looks like you are have fun anyways. :)
 

vanilladuck

E32-3 / San Francisco
Blogs Author
Yea, perhaps Grant is right.. I might have *too* much time on my hands currently. But, it's fun. Labor of love for sure.

I bought a Festool Multi-Mode ROTEX RO 90 FEQ-Plus and a dust extractor. The ROTEX has two modes for material removal and final finishing with both round and delta pads. Thinking it will be perfect for the small spaces in the deckhead, corners, detail smoothing, etc. I think I can also use it to sand the mast for painting and varnish removal, etc.

I'm shopping for respirator, dust suits, QuikFair and some other bits. This work will have to fit between the other rigging work I have going on currently. Or after. Will definitely keep this thread updated with progress along the way. Thanks for the encouragement everyone!
 

Prairie Schooner

Jeff & Donna, E35-3 purchased 7/21
A couple brothers I knew bought an old Navy 44 to rehab. They'd sailed them back in the day. I got a tour as they were beginning work. It had a cool no-nonsense battleship aesthetic below, all gray, mil-spec breaker panels, placards, etc. I'm not suggesting you do that exactly, but it might be a fun exercise to rethink the vibe below on Rumour. A telecom / Apollo look? Sez the guy perched on the edge of the lazarette, procrastinating. Going back in. Respect.
 
The most difficult part of respirator-work for me is needing to shave to get a good seal! Stay safe with all the particulates, haven’t used an intentional dust extractor before so curious how it does with things
 

windblown

Member III
Bryan,
You’ve given other 32-3 owners a great view of what’s above the headliner. Thank you! Now that you got it all exposed, are your deck handrails secured by screws into the deck (as ours seem to be), or are they bolted through?
 

vanilladuck

E32-3 / San Francisco
Blogs Author
Now that you got it all exposed, are your deck handrails secured by screws into the deck (as ours seem to be), or are they bolted through?

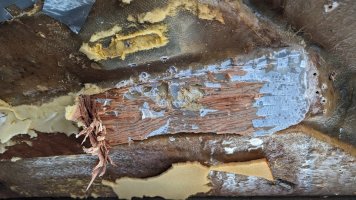
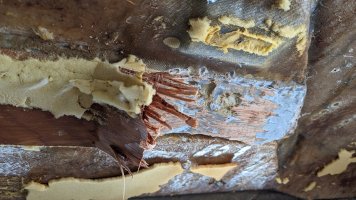
There is a 1x4 piece of lumber which is glued with super hardened construction adhesive at a ~45° angle facing inboard on each side of the deckhead. It's a centerpiece of headliner attachment as the cloth turns up to create a space for the interior cabin grab rails.

I started in with a mallet and chisel today to answer this question. Removed about a foot so far on the starboard side and haven't found any discernable through bolts. Will update again if I find some.

I attempted to remove the exterior handrails when I varnished them. I *think* I recall the fasteners being lag screws (no through bolts).

It's a fun trivia question though, because Ericson seemed to mix and match two techniques: lag screws and through-bolting with glassed in aluminum plates. I still have yet to find a single through bolt with washer and nut (except for winches and clutches, which were probably not original on Rumour). Mast deck plate, traveler on sea hood, cabin deck mounts, and interior grab rails all used aluminum plating glassed in and machine screws threaded into the plate. No shipwright worth their salt today would even consider such a thing with the availability of G10 and other backplating techniques.
 

Attachments

  • PXL_20240410_230823387.jpg
    PXL_20240410_230823387.jpg
    467.4 KB · Views: 27
  • PXL_20240410_230819670.MP.jpg
    PXL_20240410_230819670.MP.jpg
    426.4 KB · Views: 28

vanilladuck

E32-3 / San Francisco
Blogs Author
The most difficult part of respirator-work for me is needing to shave to get a good seal! Stay safe with all the particulates, haven’t used an intentional dust extractor before so curious how it does with things

Rut roh! My beard might make this problematic :oops:
 

Nick J

Contributing Partner
Moderator
Blogs Author
I really like what this owner did:


You would have to make some changes to make the panels easy to remove, but it's a good starting point. Utilitarian is good, but It may be a little out of place on an Ericson. Painting the cabin top also doesn't allow for insulation so condensation may become an issue. For context, I removed the headliner in my 25+ and never got around to replacing it before selling to the current owner (about 5 years without the liner). It functioned just fine and did make finding cabin top leaks easier. Here's a pic mid core repair:

20200214_101646.jpg

Sanding overhead absolutely sucks and I had a similar setup to what you're planning to use.
 

vanilladuck

E32-3 / San Francisco
Blogs Author
Made some progress in between spar sanding/painting and rigging projects...

Running headliner boards​

Meticulously removed all the staples in the running boards on both sides of the deck head. Started sanding the boards with the Festool RO 90 in ROTEX orbital mode (aka 'chomp ba chewy chomp' mode) and 60 grit paper. I have 40 grit on the way.

PXL_20240516_234052833.MP.jpg PXL_20240516_234040989.jpg

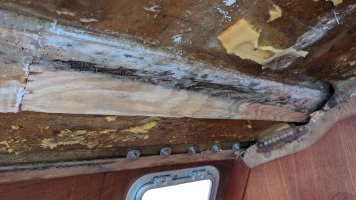
Parts of the wood are rotted from water intrusion and rusting staples. I tried to demo part of one of the boards, but it's overly time intensive and there is still a lot of resin and wood leftover. The question I'm pondering is whether to fair over the boards or try to demo them. I don't think they're intended to be structural, but I would bet they are adding some longitudinal support to the cabin top with the resin they are glued with. I'm guessing the resin is probably vinyl-ester, since that's what most boats were built with in the 80s.

If I leave them in place, I think I'll need to treat with CPES or other penetrating rot-stop epoxy before fairing. Good thing epoxy bonds to vinyl-ester.

PXL_20240516_234103512.jpg

Another look here:

Fairing at the bulkheads​

PXL_20240516_234113581.MP.jpgPXL_20240516_234130305.MP.jpg

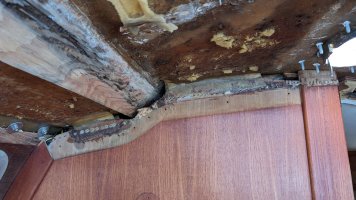
The headliner covered up the gaps at the top of the bulkheads and then the teak trim pieces covered up the staples. Now there won't be a headliner and I need a backstop for the fairing compound. Ericson glued the bulkheads to the deck head by glassing in a couple strips of fiber. I could continue by glassing in some more fiber in the gaps. It might be easier and more simple to cut some then veneer wood and glue it in place.

Note the wood rot at the top of the starboard side bulkhead. Probably more CPES needed there.

The fasteners and washers just above the opening portholes are holding the inside track for smaller headsails. I'll need to pull the hardware, re-drill, and re-bed new bolts, washers and cap head nuts after the fairing is in place.

Also, the dorade box drain was corroded to a broken state. I think I know another channel for water intrusion now ;)
 
Last edited:

vanilladuck

E32-3 / San Francisco
Blogs Author
Updates:

I pulled more staples and disconnected the lower headliner which was stapled into the bottom edge of the portlight veneer. Portlights are out of the boat now and I'm shopping for replacements for the trapezoid fixed ports -- more on that in https://ericsonyachts.org/ie/threads/replacing-fixed-windows-research-master-thread.9603/post-173993

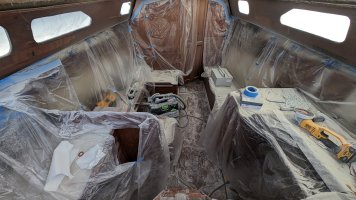
After wrapping the electronics and draping the cabin in plastic sheeting, I put CPES on the veneer and the overhead boards. Gave that a couple days to dry and began sanding. Looking back now, I probably should have waited until I sanding the raw fiberglass first.

PXL_20240605_231016014.MP.jpg

Sanding with the Festool ETS 150/5 with 40grit paper is slow and leaves little valleys of shiny fiberglass. That shiny all has to come off before applying QuikFair, an epoxy fairing mixture from System3.

PXL_20240605_230124356.jpg

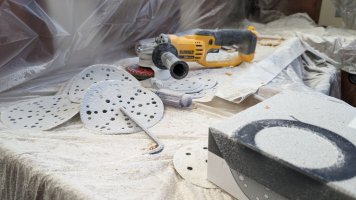
I switched over to an angle grinder with a 40grit flap wheel. This is much more effective at leveling the uneven fiberglass. But, it shoots fiberglass dust everywhere. Another drawback is my Dewalt tools are 20V battery operated. I get about 7-10 minutes of grinding per 5Ah battery. So, I've been doing ~40 minute sessions in a Tyvex suit, full face respirator and ear protection. Afterwards I wipe down the fiberglass with a water soaked sponge and wait for it to dry. This is the only way to see if there are any shiny spots left behind that need touching up.


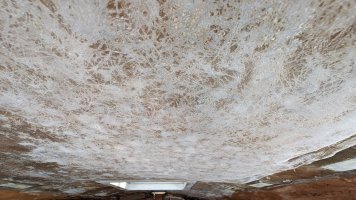
The cabin is coated in fiberglass powder -- looks like a winter wonderland.

PXL_20240610_001005033.jpg PXL_20240610_002120291.jpg

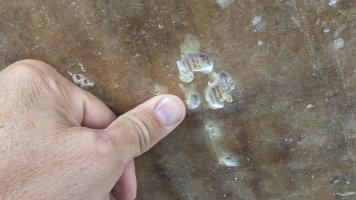
There are a couple spots where air bubbles formed in the original resin layup. The angle grinder shows these and the core wood exposed. I'll have to go back with some thickened epoxy and fill those in. I might go as far as to cover them with X-mat fiber and resin.

PXL_20240610_002004017.MP.jpg
 
Last edited:

vanilladuck

E32-3 / San Francisco
Blogs Author
I should have mentioned - Sailing Uma is where I got the tip for the flap wheel on the grinder (jog to 14:06 in the video above). Good stuff!
 
Last edited:

vanilladuck

E32-3 / San Francisco
Blogs Author
Thanks @Nick J! Yes, very itchy. The full face respirator is pretty clutch (thanks @G Kiba!!). Combined with a 3M Tyvex suit with booties and hood, and decent gloves I'm pretty well protected. There is some residual itching of course... when suiting up and down some flakes make their way into the suit. Cold showers, washing with panty hose, using tape to pull the fibers out of the skin helps some ;)
 
Last edited:

vanilladuck

E32-3 / San Francisco
Blogs Author

Updates!


tl;dr - it's been a LOT of work. I've been through a range of emotions. Filled voids, tabbed bulkheads, faired, sanded, laminated, molded, waxed, released, etc. I'm approaching final fairing and then... paint.
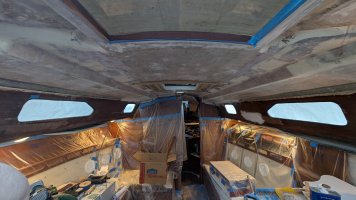
PXL_20240814_025340382.MP.jpg

This project has been a LOT. That word in all caps is probably an severe understatement. I became pretty depressed at one point and took a step back to work on a little things around the house and the SSS website/infra (old site & preview site if you're interested). This project has interrupted all other work on the boat. Watching my late summer sailing plans melt away wasn't a fun experience. But taking some time to appreciate the natural order of things, how nice the cabin will feel when this is done and getting the boat to the place where I want it to be was very worthwhile. Live in the now, as they say.

I've been known to say "sailing is the ultimate teacher of acceptance". My new thought is that the sailboat itself is the instructor.

Anywho, enough about feelings and life. Let's look at the cabin...

Terms & Definitions

Before digging in, I figure it will be good to define a few things. When I started this project I barely knew the starting concepts of working with composites. When folks around here would mention "just add some microballoons to the resin" I would scratch my head and wonder. So, I'm just including here in case there are others in the same space I was in.

Resin - anytime I mention 'resin' below, I used West System 105 Epoxy Resin with 206 Slow Hardener. It's been a warmish summer here in Richmond and I found quickly that the 205 Fast Hardener would gel way too quickly, making me rush and make mistakes.

Corecell - Corecell is a closed cell foam which is cut in sheets similar to plywood. It's rigid, but flexible to a point, and has a compressive strength of 200lb/sq-in. It's moldable with heat, and sands easily. Because of the closed cell formation it's impervious to water penetration. Used in newer boats to core the hull and other pieces which are eventually glassed in. Lighter than balsa and other woods. And not susceptible to "core damage".

403/404/406/407/410 - These are all fillers for resin from West System. See https://www.westsystem.com/filler-selection-guide-2/ for more information. Each filler has a detailed TDS to understand it's properties. They can be mixed to form intermediate solutions for adhesion, void filling, structural bonding, etc

Milled fibers - Literally, fiberglass milled into 1/32" pieces. When added as an epoxy resin filler will cure to high compressive strength. Reference: https://www.totalboat.com/blogs/totalboat/epoxy-fillers-how-when-to-use-them

Wax - Mold release wax. Epoxy won't cure to it. But, it will also contaminate your work area. I sectioned off a the chart table in the cabin as my "contamination area" where only waxed pieces and tools would go. In order to be placed anywhere else in the cabin, they would first need to be scrubbed with a clean cloth and acetone.

Peelply/Release Cloth - a cloth specially designed to not bond to cured resin. Assists with layup by creating a uniform surface on the outer most layer of fiberglass cloth.

Filling Voids​

Began filling voids and the area around the handrail pedestals by gluing pieces of corecell foam, cut to shape. I used resin with 406 in a non-sag peanut butter consistency. Because corecell is so light, the 406 would hold the pieces in place with no need for bracing or strapping. I then filled the cracks with a mixture of 406 & 407 (microballoons) and sanded everything to shape. Some voids, like under the running boards of wood I used 410 (microlight) because it filled more space with less filler. None of this is structural -- it's all aesthetic.
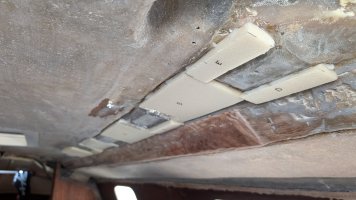
PXL_20240628_005420246.jpg

Now that I had a new intermediary nonstructural "core", I needed to complete the sandwich and laminate. I used two layers of 10oz cover cloth. Laminating upside down is a bit tricky, but the West Systems Fiberglass Manual from 2015 (see Appendix C) has some great techniques to borrow from. I modified slightly by creating a thickened film of resin and 406 on the surface. This would act as a sticky "glue" to which the cloth would stick to. Then I would wet out the sections of fabric one at a time on a makeshift large cardboard box covered in 3mil plastic sheeting. The wet-out resin has a few pinches of 406 just to keep the resin from dripping off and making a mess.

Each piece of wet fabric would then be rolled around a cardboard tube and unrolled from the highest point down to the lowest point. While unrolling with one hand I would squeegee the cloth against the thin film on the deckhead. In this way, I was able to work solo and never made a mess of my plastic covered floor. I still have all my arm hair and skin as well ;)

Peel ply release cloth was added and a ridged roller was used to ensure the cloth was compressed as much as possible into the resin.
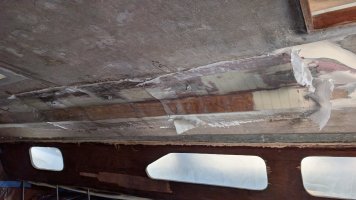
PXL_20240716_015255868.MP.jpg

I was careful to retain the mounting holes for the grabrails, which are made from threaded holes in aluminum plates glassed into the deck head in those pedestals. To do so, I used release wax on screws which would be removed for sanding after the fiberglass cured.
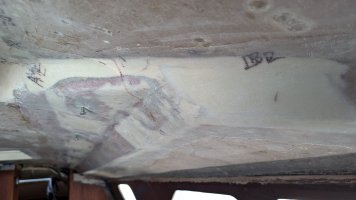
PXL_20240718_231610514.jpg

Bulkheads​

The bulkheads had some interesting spaces in between the minimal amount of tabbing from initial building. I wanted to create a smooth joint. My rigger suggested I re-tab the bulkheads to add some extra rigidity to the boat. I chose the middle ground and supplemented the existing tabs.
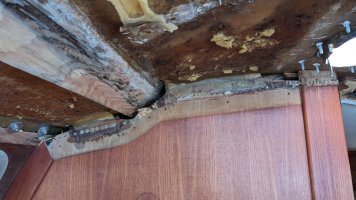
PXL_20240516_234113581.MP.jpg

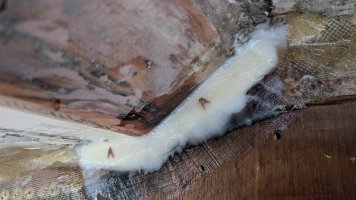
First I glued corecell into the open spaces with 406. Then I created fillets with large popsicle sticks and a combination of 406/407. I probably could have used Wood Flour as a filler, but this is probably fine.
PXL_20240802_025023026.MP.jpg PXL_20240804_230207294.MP.jpg

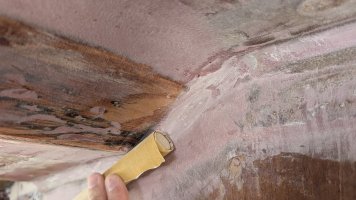
After sanding the fillets with pieces of wooden dowels wrapped in Stick-It sandpaper, I glassed over the rounded corner with 27oz X-mat (1708) cloth. 1708 has two layers of 45degree bias fabric with a .75oz smooth mat on one side. It's designed to layup with the smooth mat towards the surface for mechanical bonding strength, which leaves a rough side facing up. I covered with an additional piece of 10oz cover cloth for a smoother surface facing outward.
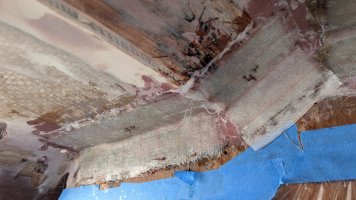
PXL_20240806_190242671.jpg

Mast Collar​

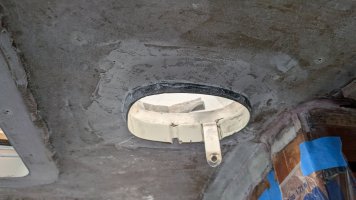
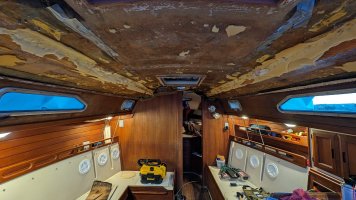
The area around the mast collar on the deck head was pretty uneven. There is another aluminum plate sandwiched in the deck fiberglass with threads for the bolts for the mast collar deckplate, which holds all the turning blocks for halyards, lines, etc arriving to the deck organizers from the mast. I decided to drill out the threads and through-bolt the deckplate into the cabin. If water penetrates the sealant on those holes, I don't want it to get trapped in the core of the deck -- the aluminum plate would begin corroding and puffing up the deck, leading to delamination and other horrible things. I'm also not at the point yet where I want to carve the plate out of the deck and rebuild. I have my limits with this project ;)

PXL_20240708_211929113.jpg

So, I mixed up a pot of resin with milled fibers and 404 (high density). This will help support the compressive strength needed for those through-bolts. I didn't bother to laminate and I hope I don't kick myself later... Just thinking with only 1/4" of filling needed at the lowest point it should be fine as long as it's faired with the rest of the deck head later.

Continuing to next post...
 

Attachments

  • PXL_20240807_184220576.jpg
    PXL_20240807_184220576.jpg
    279.8 KB · Views: 3
Top