• Untitled Document

    The 2024-2025 Fund Raising Season has Opened!

    EricsonYachts.org has opened the season for raising funds to support the expenses of the site. If you would like to participate, please see the link below for additional information.

    Thanks so much for your continued support of EricsonYachts.org!

    2024-2025 Fund Raising Info

Fairing, sanding, and painting the deckhead

vanilladuck

E32-3 / San Francisco
Blogs Author

Updates! Pt. II​

...Continued from above

Midship Hatch​

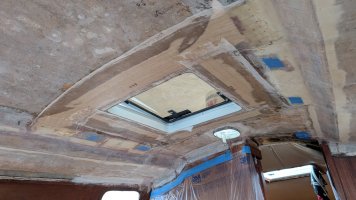
The center hatch of the boat was not fair with the rest of the ceiling. Filled with 410 and laminated with two layers of 10oz cloth. By this time, I was a few month into working with composites and it was pretty routine to get things filled and laid up.
PXL_20240814_024309599.MP.jpg

Vertical Grab Bar​

There is a vertical bar that attaches to the partial bulkhead which separates the chart table from the salon seating. Before the headliner was pulled down it had some scrap lumber attached to the ceiling to make a "level" surface to which it was bolted.

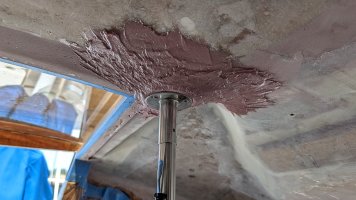
Now that's gone and not "level" (I put it in quotes, because nothing on a boat is really level, right?) I made a large pot of 404 (for strength), 406 (for non-sag), and 407 (for easier sanding). I applied that roughly to create a mount of putty that stood proud from the ceiling.
PXL_20240821_212624860.jpg

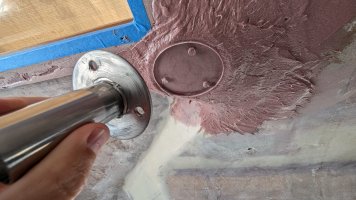
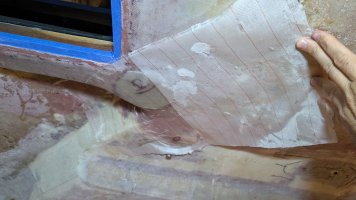
Next I waxed the pipe's stainless steel mount and temporarily mounted the post in place. I used a pick tool and a hammer to jam the mount into the putty and let it cure. After breaking it free from the cured epoxy, I sanded the mound to an attractive shape with a flat surface and glassed over it with a layer of X-mat and three layers of 10oz fabric. Now there is enough glass I can land a few pilot holes for screws for the mount later.
PXL_20240822_205658326.jpg PXL_20240827_034835160.jpg

Other Things​

  • Companionway wood trim - I used plastic wrap and wax to shape the putty around the wood trim pieces in the cabin so that the faired ceiling would meet the wood trim without a gap. Laminated over.
  • Aft corners of the cabin - created nonstructural fillets to blend the ceiling into the nice teak bulkheads
  • Portlight veneer - Sanded it all down and applied local fairing to the parts of the veneer that delaminated and peeled off. I'm planning to apply several coats of un-thinned epoxy to the wood to seal it up. Then sand and final fairing with the rest of the deckhead.

What's Next?​

Final fairing.
Sanding.
Painting.

I've chosen Awlgrip as my preferred paint. I know it's overkill for inside the cabin, but it will last a long time and be more resilient to stresses. Plus, I could use some practice rolling & tipping for when I paint some exterior parts of the boat. I'm leaning towards Awlgrip 545 Epoxy Primer and then a topcoat that matches the old headliner with enough flattener to make it either semi-gloss or matte finish. Semi-gloss will probably be easier to clean without being too bright.

I might try painting the portlight veneer with whiteboard paint, which would create a dry-erase board for keeping notes to myself under way.

I've kept and labeled all the original teak trim pieces and expect to put most of those back up. I think it will give the cabin a combination of modern and classic looks.
 

G Kiba

Sustaining Member
AMAZING work Bryan! Compared to my memory of the last time I saw the interior, it looks like you are real close and it looks good.
 

vanilladuck

E32-3 / San Francisco
Blogs Author
Update!

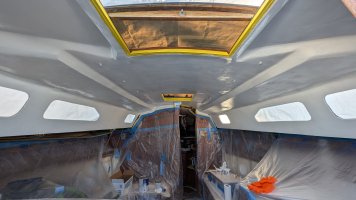
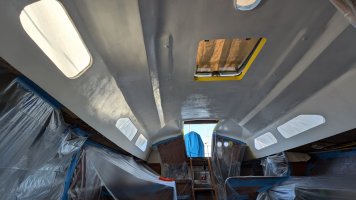
After 5 months of building, the first couple coats of primer are up:


I received some advice from a local composites expert: use Pro-Line 3000 high build epoxy primer before moving on with the Awlgrip coats. Pro-Line 3000 is a marine product made by Sherman Williams which is typically used as a high-build barrier coat before anti-fouling paint. It will fill very small imperfections in the fairing done across the deckhead. Awlgrip tends to go on pretty thin and if sanded, one runs the risk of sanding right through the primer.

PXL_20240922_005859842.MP.jpg

PXL_20240922_005627036.MP.jpg

I'm very pleased with the results so far. Here's the layering:

  • Pro-Line 3000, 2 coats, rolled
  • Awlgrip 545 Epoxy Primer, 2 coats, rolled
  • Awlgrip Topcoat, 2 coats, flattened, rolled and tipped
I chose Awlgrip Blanc Pur for the final color. I'm hoping it will retain some of the yellow hues from the old headliner that matched the teak and laminate counters while looking a bit more modern. Going for a matte finish with the flattener.
 

vanilladuck

E32-3 / San Francisco
Blogs Author
Update: 99% done

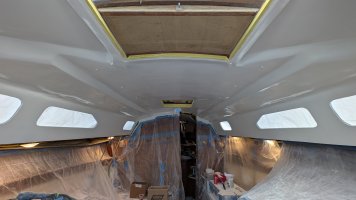
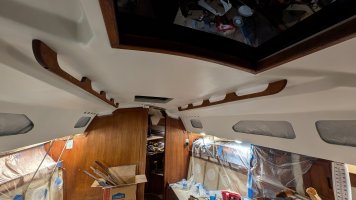
The fourth and final topcoat of Awlgrip went up a week ago Saturday. I couldn't be more pleased with the final result:

PXL_20241013_003437370_exported_1729010759413.jpg

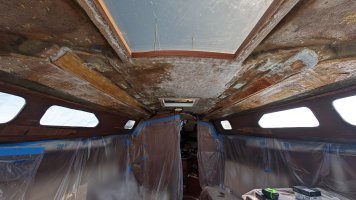
For reference, here's where the project started after the headliner was removed:

PXL_20240605_231016014.MP.jpg

Getting there was an adventure, especially since I was rolling the paint on. The Awlgrip Topcoat TDS specifies a ratio of 2:1:10-33% (Base:Converter:Reducer). Not having used two-part paints in the past I started at the lower end of reduction, 10%. I was also flattening the paint because I didn't want a high-gloss mirror shine on the ceiling in the cabin. My goal was to apply hot coats of the topcoat paint so that I wouldn't have to sand again -- I still have "sanding fatigue" ;) Hot coats, or overcoats, have to be applied 16 hours after the previous and prior to 24 hours after previous. Combine that with dew point and temperature ranges and one is presented a very unique moving target. Below is the schedule of coats and ratios I used, with some notes:

Coat #Time AppliedRatio (base : flattener : converter : reducer)Painting MethodNotes
120241009@1820PT2:2:1:10%RolledBubbles appeared when rolling which I mistook for texture from the flattener. Examining the next morning I scuffed the entire surface with a Scotchbrite pad to knock everything back down to smooth surface.
220241010@1600PT2:2:1:10%Rolled + TippedTipped with a high quality 2.5" brush to pop the bubbles. But, the paint flashed too quickly and left the brush strokes behind.

Guess I'm sanding. Again :-/
320241011@1700PT2:2:1:20% + 6ml Alexseal 501RolledReceived a hot tip about Alexseal 501 Roll Additive. It pops the bubbles so you don't have to tip. I also doubled the reducer to give the mixture a chance to "lay down" appropriately.

The result looked great except there were a few pressure marks from the roller.
420241012@1730PT2:2:1:20% + 10ml Alexseal 501RolledRepeated the last ratio and application method, but used nearly double the Alexseal 501 additive.

General Notes: always used new polyester woven 4" x 3/8" nap roller; PPE included Tyvex suit, hood, booties, gloves, and 3M full-face respirator; Awlgrip Topcoat base color is 'Blanc Pur' which sits in hue somewhere between the old headliner and the laminate counter tops

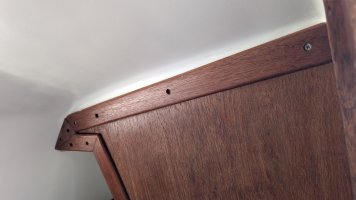
Except for a handful of very small areas, the final result is beautiful. Somewhere between a matte and semi-matte surface.. smooth, easy to clean, and even in color and vibrance. The Alexseal 501 Roll Additive was a real lifesaver. It's not documented anywhere, but because polyurethane paint is polyurethane paint, the additive works between brands. I started adding some of the teak trim pieces and grab rails back in place. The trim needed some sanding and carving to fit in some newly rounded corners:

PXL_20241018_022035116.MP.jpg PXL_20241015_230657107.jpg

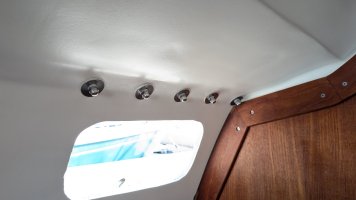
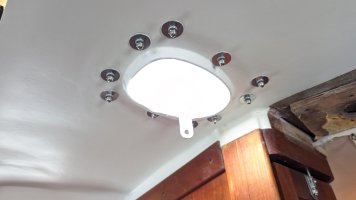
Began through-bolting some of the existing gear, like the mast deck plate and inside jib car tracks on the cabin top:

PXL_20241018_214815558.MP.jpg PXL_20241018_214828374.MP.jpg

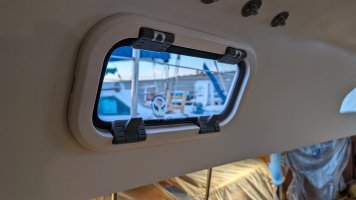
And installed the new Lewmar Standard Opening Size 1 portlights in the salon:

PXL_20241022_011505519.jpg

I have one more teak trim piece to place at the bottom edge under the portlights. I'm going to wait until after the new trapezoid windows arrive and are installed/bedded.

Now there's a lot of cleanup to do. Dust is everywhere, even though I covered and wrapped everything in 3mil plastic. And I mean, every. where. But, what about the aft quarter berth, the head, and the v-berth? Those areas will need to wait. Rumour hasn't been sailed since February and I need to get the rig back up and on the water. Maybe those other areas can be finished after Hawaii.
 
Top