2023 Project. Interior ventilation of the enclosed compartments, material & appearance much upgraded.
Background: In 2008, I added cast plastic louvered vents to all of the settee fronts in the main cabin and forward cabin, and cleaned up lots of ancient black mold/mildew from those “hidden spaces”.
The only way to keep this problem from recurring or at least minimize it is to ventilate all the spaces. Moisture from condensation on the hull is what provides a growth medium for the spores.
More background: Right after we bought the boat we replaced all of the cloth zippered “doors” on all three of the hanging lockers with Phifertex woven material. This allows air to circulate into all the lockers. No mold problem in those larger lockers since.
The smaller zippered door/closures on the head counter and galley counter were replaced also. The air circulation really 98% halts the recurrence of more black mold. Moisture is the problem and air circulation is the answer, IMHO.
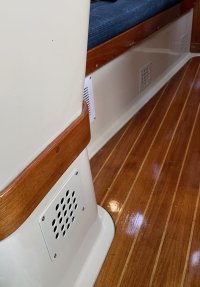
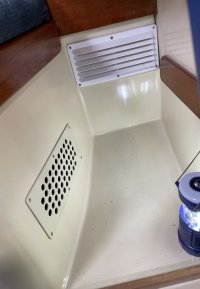
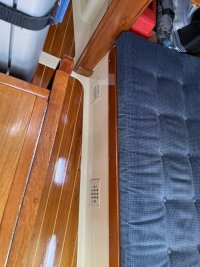
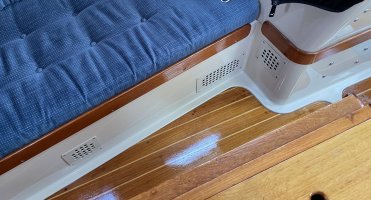
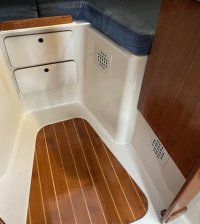
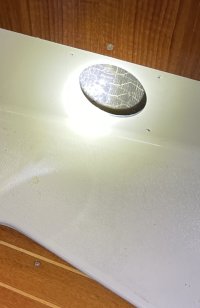
It's 2023, and back to those plastic vents on the settee front moldings. There are nine smaller ones, and another three of the rectangular ones in the aft part of the cabin. These all provide much-needed access (!) to wiring and plumbing as well as ventilating formerly enclosed spaces.
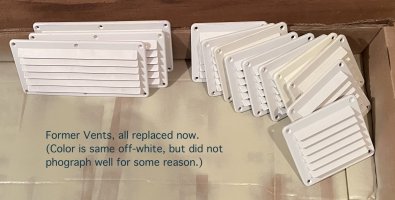
The plastic vents all functioned just fine, but, to me, always looked like a flock of ‘dryer vents’ had invaded the boat. I looked for a flat version with no protruding louvers, but never have found any. I had originally created the holes for most of them with a 4” hole saw. The three larger rectangles were cut with a saber saw.
This year I sourced some new G10 frp blanks, precut, from https://www.professionalplastics.com.
I specified .093 inch thickness “natural FR-4 sheet”. This is about equivalent to 3/32”, for us metric-challenged folk. I gave them the exact external dimensions of the plastic ones to be replaced, and they were precise with their diamond-edge saws.
I designed a hole pattern for the new ones, with 1/2” holes, drawing up the pattern using my ‘vintage’ drafting basic tools, not having software on hand nor (more importantly) time to learn how to use it.
Once I had a paper pattern, it was glued to the first blank, and a master frp pattern was drilled out on my drill press. Then that first one was locked onto layers of blank pieces, four at a time, and all holes drilled out. Same for the corner fastener holes. I did have to buy a new countersink bit for the corner holes to accept flush flathead screws, and also to lightly chamfer all of the vent holes. The edges were sloped on my disk sander. Corners were rounded to match the original plastic pieces.
Note that I built a 'drilling fixture' to lock the pieces together, out of scrap bits. Not elegant but it worked well.
Once lightly sanded, several coats of paint were applied. I was very very lucky in finding spray-can paint in the right color. It is labeled "appliance" paint, "almond."
In addition to Olson owners, this project might interest owners of 70’s EY boats with FRP interior moldings. The 80’s EY boats with the all-teak interiors would look a lot better with teak vent plates, and a friend of mine build some for his E-38. He designed a checkered pattern in thin teak pieces, about the same overall size as mine. Subtle and classy. Same problem and similar solution to increasing air flow, tho.
If the narrative and pix are not clear enough, please let me know.
Edit: added photo of all the replaced vents. If anyone wants them, they are available for the cost of shipping.
*Pattern* note: I have the JPEG file for each size of vent pattern, and will email a copy go anyone wanting one. That might save you an hour or two.
Background: In 2008, I added cast plastic louvered vents to all of the settee fronts in the main cabin and forward cabin, and cleaned up lots of ancient black mold/mildew from those “hidden spaces”.
The only way to keep this problem from recurring or at least minimize it is to ventilate all the spaces. Moisture from condensation on the hull is what provides a growth medium for the spores.
More background: Right after we bought the boat we replaced all of the cloth zippered “doors” on all three of the hanging lockers with Phifertex woven material. This allows air to circulate into all the lockers. No mold problem in those larger lockers since.
The smaller zippered door/closures on the head counter and galley counter were replaced also. The air circulation really 98% halts the recurrence of more black mold. Moisture is the problem and air circulation is the answer, IMHO.
It's 2023, and back to those plastic vents on the settee front moldings. There are nine smaller ones, and another three of the rectangular ones in the aft part of the cabin. These all provide much-needed access (!) to wiring and plumbing as well as ventilating formerly enclosed spaces.
The plastic vents all functioned just fine, but, to me, always looked like a flock of ‘dryer vents’ had invaded the boat. I looked for a flat version with no protruding louvers, but never have found any. I had originally created the holes for most of them with a 4” hole saw. The three larger rectangles were cut with a saber saw.
This year I sourced some new G10 frp blanks, precut, from https://www.professionalplastics.com.
I specified .093 inch thickness “natural FR-4 sheet”. This is about equivalent to 3/32”, for us metric-challenged folk. I gave them the exact external dimensions of the plastic ones to be replaced, and they were precise with their diamond-edge saws.
I designed a hole pattern for the new ones, with 1/2” holes, drawing up the pattern using my ‘vintage’ drafting basic tools, not having software on hand nor (more importantly) time to learn how to use it.
Once I had a paper pattern, it was glued to the first blank, and a master frp pattern was drilled out on my drill press. Then that first one was locked onto layers of blank pieces, four at a time, and all holes drilled out. Same for the corner fastener holes. I did have to buy a new countersink bit for the corner holes to accept flush flathead screws, and also to lightly chamfer all of the vent holes. The edges were sloped on my disk sander. Corners were rounded to match the original plastic pieces.
Note that I built a 'drilling fixture' to lock the pieces together, out of scrap bits. Not elegant but it worked well.
Once lightly sanded, several coats of paint were applied. I was very very lucky in finding spray-can paint in the right color. It is labeled "appliance" paint, "almond."
In addition to Olson owners, this project might interest owners of 70’s EY boats with FRP interior moldings. The 80’s EY boats with the all-teak interiors would look a lot better with teak vent plates, and a friend of mine build some for his E-38. He designed a checkered pattern in thin teak pieces, about the same overall size as mine. Subtle and classy. Same problem and similar solution to increasing air flow, tho.
If the narrative and pix are not clear enough, please let me know.
Edit: added photo of all the replaced vents. If anyone wants them, they are available for the cost of shipping.
*Pattern* note: I have the JPEG file for each size of vent pattern, and will email a copy go anyone wanting one. That might save you an hour or two.
- Published Date
- Oct 23, 2023
-
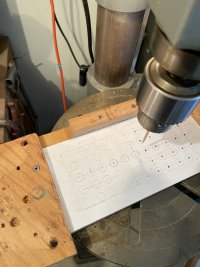 Drilling pilot holes.JPG
 -
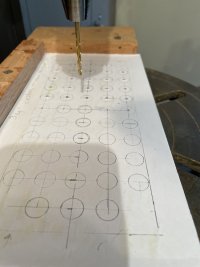 pilot holes larger vent plate.JPG
 -
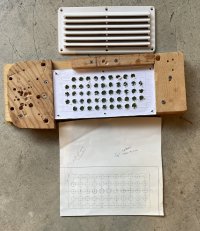 Pattern with old and new .JPG
 -
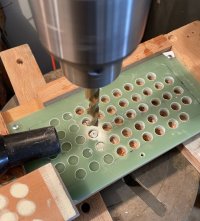 Drilling thru pattern.JPG
 -
 Port side all new.JPG
 -
 Nav Well, done.JPG
 -
 Nav Footwell, new and older vent.JPG
 -
 Starboard settee done.JPG
 -
 strarb settee & galley area.JPG
 -
 Forepeak new vent done starboard.JPG
 -
 Forepeak Hull inrterior Still clean.JPG
 -
 Vents, retired.JPG